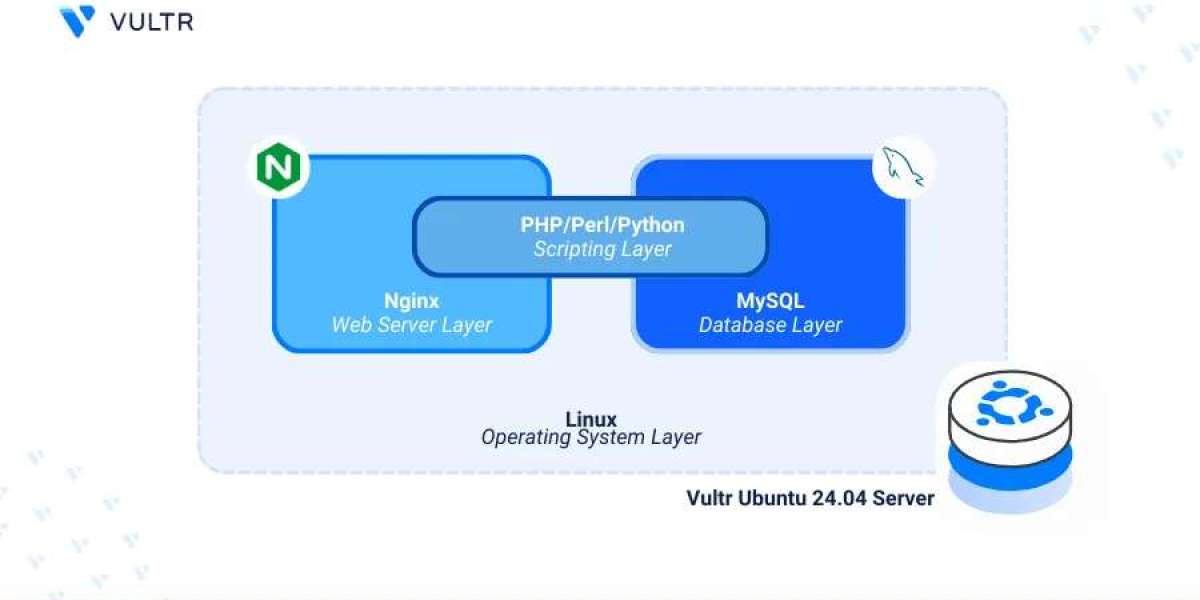
If you’re planning to build a powerful web hosting environment using Ubuntu 24.04, one of the most efficient ways to get started is by installing the LEMP stack. The LEMP stack—Linux, Nginx (pronounced "Engine-X"), MySQL (or MariaDB), and PHP—offers a robust, lightweight, and high-performance solution for hosting modern web applications such as WordPress, Laravel, and other PHP-based frameworks.
In this guide, we’ll walk you through how to install LEMP on Ubuntu 24.04, optimize it for web hosting, and ensure your server is production-ready. We also reference the official Vultr LEMP stack tutorial, which provides a comprehensive base for configuration and setup.
Why Use LEMP for Web Hosting?
The LEMP stack is known for being faster and more resource-efficient than its counterpart, the LAMP stack, which uses Apache instead of Nginx. With Nginx’s asynchronous event-driven architecture, it can handle thousands of concurrent connections with minimal resource consumption—making it ideal for VPS and cloud environments.
Step 1: Update Your Ubuntu 24.04 System
Before installing any software, update your system to ensure you're working with the latest packages:
sudo apt update && sudo apt upgrade -y
This step ensures better compatibility and security.
Step 2: Install Nginx Web Server
To begin, install the Nginx web server:
sudo apt install nginx -y
Start and enable the Nginx service:
sudo systemctl start nginx
sudo systemctl enable nginx
Check its status:
sudo systemctl status nginx
You can test Nginx by visiting your server’s IP address in a browser. You should see the default Nginx welcome page.
Step 3: Install MySQL Server
Next, install MySQL to manage your databases:
sudo apt install mysql-server -y
After installation, run the security script:
sudo mysql_secure_installation
This will allow you to set a root password and remove unnecessary default settings. It’s essential for keeping your server secure.
Step 4: Install PHP and Required Modules
Install PHP-FPM (FastCGI Process Manager) and essential PHP modules:
sudo apt install php-fpm php-mysql php-cli php-curl php-xml php-mbstring php-zip -y
Check the installed PHP version:
php -v
Ensure that PHP-FPM is running properly:
sudo systemctl status php8.2-fpm
Adjust the version number (php8.2) if you're using a different PHP version.
Step 5: Configure Nginx to Use PHP
Edit the default Nginx site configuration:
sudo nano /etc/nginx/sites-available/default
Update it to look like this:
index index.php index.html index.htm;
location ~ \.php$ {
include snippets/fastcgi-php.conf;
fastcgi_pass unix:/run/php/php8.2-fpm.sock;
}
Save and close the file. Then test and reload Nginx:
sudo nginx -t
sudo systemctl reload nginx
Step 6: Test PHP Processing
Create a simple PHP file:
echo "<?php phpinfo(); ?>" | sudo tee /var/www/html/info.php
Visit to confirm that PHP is working. Once verified, remove the file:
sudo rm /var/www/html/info.php
Step 7: Optimize and Secure Your Server
To ensure your server performs well in a production environment, consider:
Using UFW (Uncomplicated Firewall):
sudo ufw allow 'Nginx Full'
sudo ufw enable
- Setting up SSL with Let's Encrypt for secure HTTPS connections
- Configuring automatic updates for security patches
- Limiting MySQL remote access and using strong passwords
Final Thoughts
By following this guide, you’ve successfully learned how to install LEMP on Ubuntu 24.04 and optimize it for modern web hosting. Whether you're deploying a WordPress site, launching an eCommerce store, or running a custom PHP application, the LEMP stack provides a fast, flexible, and secure foundation.
For deeper customization and advanced configurations, check out the complete Vultr LEMP tutorial, which dives into additional best practices for a production-ready server.
With your LEMP stack up and running, you're now ready to build and host high-performance web applications on Ubuntu 24.04!